
This post will discuss testng.xml file, what it is, why we should use it, and how we can execute our cases using XML files.
Note: We have also attached a video at the end of this article. In case you are more comfortable with the video version, then please feel free to have a look
What is a testng.xml file?
testng.xml is a configuration file used to organize and execute test cases. It lets us define which tests to run, in what order, and even what parameters to pass. So, we can think of it as a playlist for our test cases.
Most organizations use testng.xml to execute their test suites, which may contain thousands of test cases.
Why should we use the testng.xml file?
Now, the question is, why do we even need a testng.xml file? We can simply write test cases in a class and execute them via any IDE like Eclipse or IntelliJ. Most IDEs provide a way of running all the cases in a class or running a single test case as well.
The below screenshot shows how to run a single test case using IntelliJ IDE.

But what if we wanted to run test cases from multiple classes or execute only selected ones? How do we facilitate that? This is where testng.xml shines. It helps us –
- Run specific tests ( like test1 from class1 and test2 from class2 )
- Group test cases
- Run cases in parallel
- Help organize tests in the form of suites
- Help execute TestNG tests from CI/CD tool like Jenkins
How to run test cases using the testng.xml file?
The testng.xml file uses different keywords and configurations to execute and organize test cases. We’ll begin with some fundamental keywords and configurations to help you get started with test execution. In future posts, we’ll explore more advanced configurations of the testng.xml file.
So, let’s start with the below keywords –
- suite
- tests
- packages
- classes
- and methods
The image below shows the hierarchy with the suite at the top and methods at the bottom. We will write them in the same order in the testng.xml file, too.

- A suite in TestNG is represented by the <suite> tag.
- Test in TestNG is represented by the <test> tag.
- A package is represented by the <package> tag
- A single class is represented by the <class> tag.
- And methods in TestNG are represented by the <method> tag.
Note: Apart from the<suite> and <test> , other tags aren’t mandatory. Depending on the requirement, one or more tags can be omitted.
Writing a test case
Below is the project structure of our Maven project where we have added TestNG.

We will write our test case in the CodekruTest class.
1 2 3 4 5 6 7 8 9 10 11 12 | package org.website.codekru;import org.testng.annotations.Test;public class CodekruTest { @Test public void test() { System.out.println("Executing first test case"); }} |
So, let’s now run the test using testng.xml. In this post, we will cover how to execute all tests inside a package or how to run a specific class.
Run the whole package via testng.xml
Make a new file with the name “testng.xml” at the root of the project ( You can name the file anything; it is not necessary to keep the name as testng.xml )
We can run the whole package by using only these tags – <suite>, <test>, <packages>, and <package>
If we remember the hierarchy, the <suite> tag will come first, followed by the <test> and the <package> tags.
1 2 3 4 5 6 7 8 9 | <suite name="codekru"> <test name="codekruTest"> <packages> <package name="org.website.codekru" /> </packages> </test></suite> |
- Each tag includes a name attribute that specifies the name associated with that tag. The package name should reflect the actual package or path intended for execution.
- <packages> tag will contain a list of packages we want to execute. Each package will be mentioned using the <package> tag.
- Here, we only had one package: “org.website.codekru“, so we used the package name as is.
Now, run this XML file. We can run the XML file by right-clicking on the XML file and then choosing Run As > TestNG Suite.
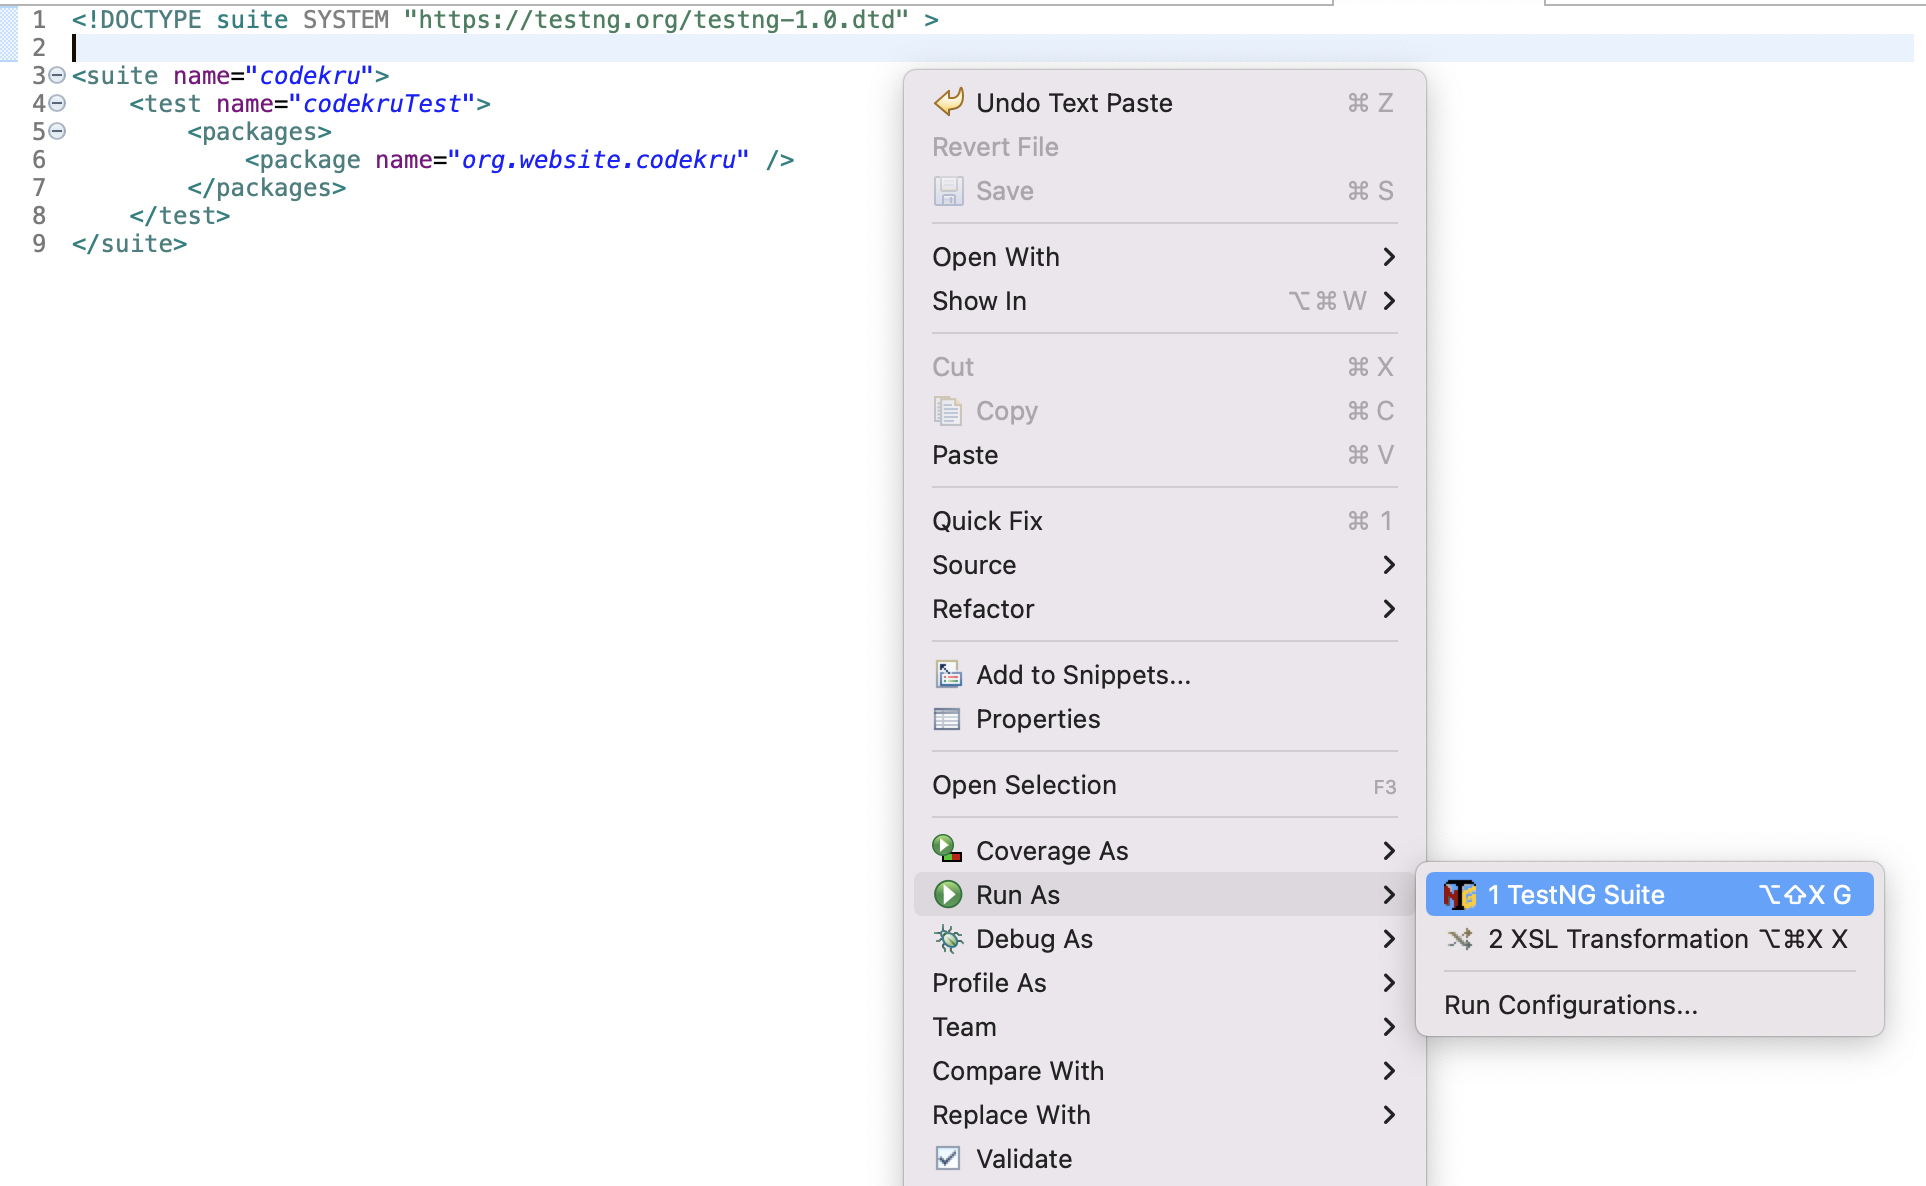
This will execute all the cases inside the “org.website.codekru” package. With just a single test case available, the program executed that particular case, and we could observe the output on the console.
Executing first test case

===============================================
codekru
Total tests run: 1, Passes: 1, Failures: 0, Skips: 0
===============================================
Run a class via testng.xml
Similarly, we can also run all cases of a specific class. This would only require the use of <suite>, <test>, <classes>, and the <class> tags.
1 2 3 4 5 6 7 8 9 | <suite name="codekru"> <test name="codekruTest"> <classes> <class name="org.website.codekru.CodekruTest" /> </classes> </test></suite> |
Here, the class name should be written in the “packageName.className” format. Our package name is “org.website.codekru”, and the class name is “CodekruTest”, so we have written “org.website.codekru.CodekruTest” as the class name within the tag.
Running the XML again will give us the below output.
Executing first test case

===============================================
codekru
Total tests run: 1, Passes: 1, Failures: 0, Skips: 0
===============================================
We can see that the test case within the CodekruTest class was executed successfully. Additionally, we can run a specific test case through the testng.xml file, as discussed in a separate post. Please refer to that article for further details on this topic.
We can also run a specific test case via the testng.xml file, which we covered in a separate post. Please read that article to get more insight into the topic.
Related Articles
Video Tutorial
We hope that you have liked this article. If you have any doubts or concerns, please write us in the comments or mail us at admin@codekru.com.